Friday, 17 February 2012

I came over all "Nick Sanders" today ......

Having just swapped out three rusty allen bolts up front and given Mr. T a good jet washing, all I can say is, “I did come over all Nick Sanders” (in a good way mind Nick) and went mad with the stickers.

The stickers have been sat in the garage for quite a while and having had Jaxon fire me over half a dozen just made it impossible not to adorn my trusty stead with them. So out came the box and away I went.


As Jaxon would say Mr. T looks “Awesome!”.  

I had a couple of hours in the garage with Mr. T yesterday fitting the Gerbings Heated Jacket Liner wiring looms and mounting the portable controller for my jacket near the seat lock. The looms were a doddle to fit running the wires under the tank and then under the seat meant a really neat finish. Sadly I found I need at least two extension leads to ensure it’s easy to plug the jackets in.


Very tidy if I do say so myself

Whilst I was in there I also mounted the Action Cam that I’ve owned for a couple of years now. I hardly ever use it but it’s nice to know the mount is there just in case.


Roll camera, action......

 I thought I’d better give the new additions a quick ride out before our trip down to the Overlander Adventure Tour Bike Day at the Ace Cafe on Sunday 21st February so headed into Rochdale. All I can say is "WOW!" the heat from the jacket is simply amazing, I had to stop twice to turn the heat down. Warm arms, front, back and neck, these Gerbings Heated Jacket Liners are simply amazing. The only question I have to ask myself is "Why on earth has it taken me so long to buy one?"

If you are toying with the idea of buying a heated jacket, as I did for some considerable time, "Just do it!". It will be the best investment you make in a very long time. Don't just take my word for it call and speak to Martin at Powered Adventures.

Finally my "Man in America" is busy working away on the petrol tank project and all is going to plan. I will be dedicating the 10,000th Blog Hit page to The XT1200Z Tank Conversion Project so just keep watching this space for further updates.......


Here's to the final piece of the puzzle......


Monday, 13 February 2012

Will that door bell ever stop ringing today?


I never heard the first ring but Jeannie came through to Lilie Rose and I to inform us

 “Your parcel is here from America”

“Brilliant, it will be my bar risers from Jaxon”

“Sounds interesting”

“They lift the handle bars on the bike, it will straighten my back a little more and also give us a load more space for the bigger tank”

I was right it was a shiny new set of solid aluminium bar raisers all the way from Texas.


Looking Good!

A quick pop into my office (box room) to catch up with my emails and the door bell went again. It was my Akrapovic Carbon Exhaust hanger for Trinity. The guy (ppl-1) from whom I’d bought the exhaust system had made contact with me a couple of days ago through eBay to ask if I would be interested in buying  an original Akrapovic Carbon Exhaust Hanger as he had just taken delivery of 6 and was selling them on at half price. No need to ask twice, I emailed straight back with my order, that is once he’d emailed me a link to a couple of pictures. I’ll get round to fitting it when I have another day on Trinity but at the minute it is Mr. T’s turn for some T.L.C.

So with Bar Raisers in hand I headed into the garage and moved the Touratech Bar Bag to one side and took a couple of photos so I could position the bars at the same angle. Once I’d loosened the 4 bolts I gave Jeannie a shout to come and hold the bars whilst I fitted the raisers. Two minutes later I was tightening the clamp bolts up. I took a couple of photos again and compared one against the other.  The angle of the bars was spot on however when I sat on Mr. T the bars need adjusting back just a little. Bolts re tightened, bar bag replaced, remembering to insert the iPod cable back into the bottom of the bag, job done!


Bish


Bash


Bosh


Job Done!


Loads of space for the new tank.


Heading into the kitchen and the door bell went again. Good grief! It was the Gerbing kit. I only placed the order last Thursday with Martin at Powered Adventures.

I have been looking at buying some heated clothing ever since riding back from Colditz in temperatures of -6 degrees. However until spoke to Martin at Powered Adventures I was not 100% committed to the idea. Martin has a wealth of knowledge and information; not pushy and was happy to answer all of my questions no matter how daft they sounded. Once I had all the information written down I began to work out what sort of set up worked best for Ben and I. As Ben or Jeannie are on the back most of the time I chose to have a Small jacket which will fit both of them, although a little large for Ben at the moment. He's growing so fat no that I'm not overly worried. I drew up my list, 1x Small jacket liner, 1x medium jacket liner, 1 XX small gloves for Ben, a dual portable controller for Ben and a single portable controller for my jacket (well if I'm doing it I'm doing it right). I gave Martin call back 15 minutes later and that was that.

So after having Jeannie try the small jacket and gloves on which where a perfect fit I tried the medium jacket but the sleeves are too short and the neck is a little on the tight side too. Medium  / regular is just a little too short in the arm but the other jacket is small / long and the sleeves are perfect, so I need a medium / long. A quick call to Martin and he emailed me the returns slip telling me they will swap the jacket without further issue.  (down side repairs and replacments can take 4-6 weeks, gutted). I feel another call to Martin comming on.

So it was back into the garage to wire up the jacket. I was chuffed to find the side panel comes off a treat with the bars attached. One thing I was not looking forward to was having to remove the AltRider Crash Bars, no such issues, Bonus!

Side panel off, seat off, battery disconnected, Gerbing power lead fitted, battery reconnected lead fed under tank and out by left leg, side panel back on. Back in for a coffee 10 minutes from start to finish.

Now Jaxon has been a true gentleman and sent me over half a dozen company stickers so I just HAD to find somewhere to put them. Obviously the top box was prime suspect as I never take it off so first up rear centre, followed closely by a couple of stickers on each side which look really smart, in my opinion that is.


Pride of place on "The Wall of Shame"


This will give folks something to talk about!

Sad I know but I had started last night on the sticker side with of all things a Skull & Crossbones which had been given to me at a set of traffic light in Warsaw, Poland in 2010 by some guy in a car.


“A random act of kindness”


Mr. T is now suitable "suited and booted" and looking very “individual” just the way I like him.

“Hold on a minute was that the door bell I hear..........!”


Saturday, 11 February 2012

Iron Butt Association UK. (IBA UK)


When and how did I get involved with the IBA UK? Now that’s a couple of good questions.

Luckily for me the answers are quite a simple,


I joined the ranks of the IBA on Saturday the 20th of June 2009 by participating in 


As ever the idea to do the ride in the first place came from Ron’s my best mate from so long ago I hate to think about it. 

“But first of all, what is the Iron Butt Association (IBA)?”  

Well in my opinion and that’s all it is an opinion, the IBA is all down to one man promoting his dream “The Sport of Safe Long Distance Riding” Mr Mike Kneebone.


If you would like to read more about this amazingly dedicated man and the Iron Butt Association you will find everything you need to know on the IBA Website


You know, when a web site introduces its self like this:-


Welcome to Iron Butt Association's web presence!


The 50,000+ members of the Iron Butt Association are dedicated to safe, long-distance motorcycle riding. Although based in the United States, we have thousands of enthusiastic members throughout the globe! One of our more popular slogans is, "The World Is Our Playground."


This web site is home for hundreds of excellent stories about long-distance riding. One will also find a vast amount of technical information regarding the art and science of endurance riding. Our most famous document, the IBA "Archive of Wisdom", contains the collective wisdom and knowledge of some of the most experienced, seasoned Endurance Riders in the world!


Enjoy your visit!


You know you are in the presence of true long distance riders. There is so much to be discovered about the IBA on the site that I am not even going to try and explain but invite you to have a good look at everything there is to see. It’s an amazing site and one in which you can lose yourself for hours at a time.


However, pulling myself screaming and shouting back to this side of the pond.......

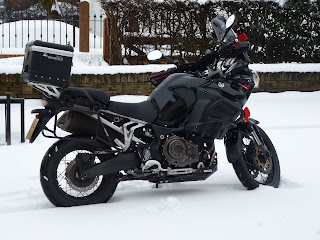
Well today is a good day for me to have a think and recollect, why even I became involved at all with the IBA UK? Prompted by the arrival of my BBG1500 (Bun Burner Gold 1500 miles) Back Plate, so called as it is mounted behind, our number plates and a number of “patches” from rides, I successfully completed.


How to cheer me up "Big Time"
Many thank's Phil your "The Man"


To answer the question “Why did I get involved?” I really do need to step back, way back to when I was serving as a chef in the British Army in fact no, even further back to 1977. I’d always ridden motorbikes bikes from the age of 14. Blasting about on my friends Honda 50 in the fields around the farm where his family lived and worked, but it wasn’t until 1982 that I really went for it.

Riding from Chesterfield to Skegness on my Suzuki 125cc Stinger in 82, aged 19, was in all honesty the first truly “Big  Ride” I ever undertook. No sat navs back then and with 90 miles in front of me I was over the moon when I arrived some 2 hours later much to the total shock of my poor Mum who instantly described me a “Bonkers”. Something she would remind me of some years later when I appeared on the drive in Temple Normanton astride my brand new gleaming Honda CBR1000 in 1986, having ridden from Munster in Germany some 580 miles just for a Saturday night out with Jaqui my sister. Something I did repeatedly over the next few years. And again when I rode from Rinteln in Germany on my Kawasaki ZXR750 L1 in 1993, a mere 632 miles-just for something to do. A tour around Europe on my Triumph Dayton 675 followed much later in 2008 and so as you can see jumping on a bike and heading off with little or no planning is something I have been doing for 30 years now.


Back to 2009 when Ron rang to suggested we sign up and get involved to raise upwards of £50 each in sponsorship money for the Royal British Legion  I jumped at the chance. Finding out I would get an SS1000 patch, certificate and automatic membership to the IBA UK was the added incentive to get involved. I completed the RBLR 2010 but had to cancel my entry into the 2011 event due to sciatica but I plan to do the ride again this year.


This is where the insanity begins

Only once I had filled in the on line form, and agreed to raise £50+ did I then realise that I had to ride 1000 miles in under 24 hours. I remember telling Jeannie what I was planning to do and yes you guessed it she thought I was “Bonkers” too, story of my life it seems.

The first SS1000 (Saddle Sore 1000 miles) was a real eye opener and heading south on the M6 from Glasgow down towards Preston at 1am, having already visited John O’Groats and Fort William I was really feeling the strain. Luckily I was not tired but just having been on the road since 8.am that morning was taking its toll on my muscles. Seeing so many riders asleep in the service area have made me realise I was not the only one. Being happy to lead quite a few riders back to Squires start / finish point was a real up-lifter and made the whole experience worthwhile.

I really got bit by the Long Distance Riding Bug from that moment on; pushing myself to attempt a SS2000 in November was a massive low point when I had to call the ride off a 1000 miles in. Again Ron was there on the phone to guide me along the right course of action “Sack it and get some sleep”. Stubborn as ever, I rode the 186 miles home and successfully claimed an SS1000 for my troubles.


2010 I really pushed the boat out attending RTE’s (Ride to Eat) all over the UK and Europe accumulating a fair amount of certificates, patches and best of all new friends from around the world.


Product of a very miss spent 2010


Throw in a couple of SS1000 in 2009, an IAM in 2010
Land's End to John 'O' Groats x 2 plus an
IOM TT1000 in 2011 and that's me......to date!


Back in 2009 our UK President was Rodger Alan who had introduced the IBA into the UK in 2005; he was succeeded by Pete West who in turn passed on the President’s position to Phil Weston in 2010. I have had the pleasure of meeting all of them and to work with both Pete and now Phil as the IBA UK Ride Verifier. This means any rides submitted to the IBA UK for approval be it by new or current riders are verified by myself to ensure all the rules and regulations attaining to the issuing of the certification by the President are correct including mileage completed in the allotted time span and witnesses contacted as and when required to do so.

This is just my way of giving something back to the IBA UK and something I love doing. If you are interested in becoming part of the IBA UK please have a look at the IBA Forum.


IBA UK Members Patch


Saddle Sore 1000

RBLR 1000 2009 + 2010
Grim Riders National Parks Challenge
1000+ Miles in under 24 hours


End to End Gold with Ron
John 'O' Groats to Lands End via London
1000+ Miles in under 24 hours

End to End Gold with Dan, Philip and Steve
Lands End to John 'O'Groats via London
1000+ Miles in under 24 hours


SS2000K Return trip from Gibraltar
Saddle Sore 2000+KM in under 24 hours


BBG1500 Solo Trip round UK
Bun Burner Gold 1500+ Miles in under 24 hours


SS2000 with Ron
Saddle Sore 2000+ Miles in under 48 hours


BB2500 Ride to Eat in Gibraltar
Bun Burner 2500+KM in under 36 hours


2010 Mile Eater award for completion of
4 IBA Rides 1 of which is classed
as "Extreme"


Dam Busters Ride to Eat Patch

BB1500 Ride to Eat in Germany
Bun Burner 1500+ Miles in under 24 hours
(including ferry / tunnel closings)


Lithuania Ride to Eat Patch

SS1600KM Returning from Ride to Eat in Lithuania
Saddle Sore 1600+KM in under 24 hours
(never verified due to loss of paperwork, now found in being verified)


Colditz October Ride To Eat
(update - just found this in the garage)


IBA UK Back Plate
Available to riders after completing SS1000


Bun Burner Gold
1500+ Miles in under 24 Hours

So other than the IOM TT1000 in 2011 that's me............ I spent 2011 riding and visiting / touring Scotland, Normandy, France and Germany plus "Farkling" Mr. T and re-building Trinity. On the rides I could not be bothered to collect all the documentation required to apply for any IBA rides and so missed out on a number of verufiable oppertunities but had a ball all the same (sorry IBA UK I promise to be good in future).

Best I get out and do something this year........... now just what, I have no idea or do I......?


Wednesday, 8 February 2012

Had a play in the snow on Sunday


Well like most I got up to this on Sunday .................


A picture postcard snow scene.

 
Posted Image


So I thought I would try out the new Continental Trail Attacks
in the snow.................. what a joke!


Good laugh mind .......
the boy's thought it was great  fun!    


Saturday, 4 February 2012

Trinity is Done! ........Revisited, with Full Rebuild Links List.


In the Begining.............


Yesterday about 6.00pm I thought I’d just pop in the garage and put the stainless fasteners that I’d bought on eBay away. They’d been sat in my tool box bugging me, being all mixed up and that.

Then came Jeannies dulcet tones.

“So how long are you planning on leaving these fairings in the bedroom?”
“Not long, I’ll be fitting them tomorrow now I have the infill’s”

“Oh right, It’s just that I don’t want anyone scratching them as the wrappings all over the floor. I’ve tucked it away”
“No sweat, I’ll get them shifted in the morning”
Morning my .........!
I decided to lay the infill’s out on the bench to see what was what and just thought “why not?”

And so started the final push!, I uncovered Trinity, put her in the middle of the garage and got stuck in. Having all the rubber edgings, two sets of Infill’s one new one old, I used the old ones to check where everything went. There was only on infill that baffled me for a couple of minutes until I realised it went under the top off side radiator bracket not above it. Der Raymond! Mind it has been a year since I stripped her down, how time flies.

I attached both side infill’s or “fairing inners” as Kawasaki call them, then the off side front infill. Then it was time to attach the off side fairing which went on a dream but stands just a little proud of the infill. One of my hopes to have these infills fabricated in carbon has not worked as yet but I will persevere. An email has already gone out to this end and I await a response with baited breath.

I then attached the cross member to the near side fairing and the small connector to the front A frame. Fitting the A frame turned into a little bit of a pain when the alan bolt just would not get a hold. Ben helped by shining the torch through the hole straight into my eye. Bless his cotton sock’s!!! After a few choice word Ben got the idea and lit up the hole from behind me and we swapped the alan bolt, the second one bit straight away, perfect.

Fitting the near side was easy give or take getting the first front bolt in and then it was just a matter of attaching the rear cross member and the rest of the fixings.

I took a couple of pictures last night and a few today but I’m sure when we get a sunny day the colours will change yet again as every picture I take makes her look like a different bike.


In one piece at last!

So what now? I here you ask, well I had a chat with Nick at Kais today and Trinity will be going over there in the new year to be Dynojet'd and the suspension set up correctly as at the minute the rear reservoir pipe is facing down and will catch the swing arm in time. Plus the rear suspension torsion bars which Martin kindly made for me need 5mm longer bolts as they are not recessed like the originals.

Also I want to sound proof the front fairings as the foam was removed for re-spraying. Sadly Kawasaki no longer make or stock the 4 off side foam liners so I’ll be on the search for those in the coming months. I also need to fit the horn which I forgot to put on yesterday.

Amazing what difference a little daylight can make


Trinity's looking good!


As soon as the weather picks up I’ll get Trinity MOT’d, taxed and then we will be all good to go in April. Look out Squires here we come.


Roll on Summer 2012!

Here's the definitive Blog Link List (feel free to click away)

"Trinity" My Kawasaki ZXR750 L1

"Trinity"...........In the beginning there was just a Kawasaki ZXR750 L1 1993

Trinity's History  

Right Trinity's in bits so what now?

9+12 = 21 18+12 = 30 Now that’s what I call a Great 21st Birthday Present.

Honey I'm Home! Trinity's back & we're ready to commence the Re-Build.

The long awaited Re-Build Begins

Not a bad day all in all.

Now that's not what I need!

Well it’s time to take stock of where I’m up to with Trinity.

Trinity saw the light of day today for the first time since November.

All I can say is “What a difference a lunch break makes!”

Sometimes the Stuff just doesn't fit!

And it was all going so well....................

Well they are working Jim "but not as we know it!"

Mmmmm Nice! Very nice indeed........ Rizoma

It’s been a quite week but got a few things sorted.

I met a really nice chap called Ian yesterday

Made another YouTube Video last night

The work continues...................

Trinity has sadly ground to a halt ! It's now just a waiting game......

Collected Trinity's Bodywork today...............

Trinity's Tank Goes back today

Trinity August Update........... Sadly, not a lot to say mind!

The Home Coming "Trinity" is Back!

Christmas comes early for Trinity

Trinity’s Great Big Thank You Christmas List  A must read for anyone building a ZXR750 L1

Trinity is DONE!......... Well for the time being that is! And back to the end..........

I hope you have had a great read and that my years worth of Blog has been of help to you guys who like me are...................

Kawasaki ZXR750 L1 Fanatics...... Good On Yer!


Thursday, 2 February 2012

"Trinity" Hit's the pages of Fast Bike........ letters page but who cares!


Well on my second attempt to get Trinity some coverage................................................ WE DID IT!!!!

She's in the March 2012 Issue of Fast Bikes page 89 in Chatter........... but who cares Trinity gets a mention.................. how chuffed am I


Super Dad! no less ..............
Can't wait for Dash to get home


I'm over the bloody moon just to see her in Print

Just need to get her finished and back on the road ready for the Summer

Wednesday, 1 February 2012

The XT1200Z Tank Conversion Project

As with all good idea’s it started with a conversation that went pretty much like this, give or take.

“If you’re doing the Iron Butt Rally with me you need to sort out your tank, I don’t want to be having to stop for you to fill up every half hour”

“Cheers for that, at least you’ll get a smoke break, its not the 675 you know I can do 240 miles”

“240 miles, is that it.................?”

“I know the GSA can do 340 you don’t need to tell me AGAIN!” 

And with those words rattling around inside my head I thought I’d better get my sh1t together and see if I can sort out the horrendous short fall in the Yamaha XT1200Z fuel capacity of 23 litres (5.1 imp gal - 6.1 US gal).

Last year I spotted a very nice Honda Varadero (Thank's GrahamD, LOL) with one of the largest fuel tanks I have ever seen but I felt it was just a little “Too Radical” for my taste. Mind I would have liked to have met the owner and found out where the fabrication had been done.


Now that is what I call
a LARGE fuel tank.

Having had a good look at Kevin’s FJR Tank Expansion Conversion at the weekend only added more fuel to the fire (no pun intended, much!)


Spot the difference, very sutel  but
effective!


So with a little rooting around the Yamaha Super Tenere Forum I found the thread I was looking for, fellow XT1200Z owners who were as disgruntled as me. I added my pennies worth to the already busy thread and asked ~TABASCO~  if he could fabricate me a tank, increasing capacity by at least 5 litres, the answer came back with a categorical “Yes, I can do that for you” and so my New Project sprang to life.


After a quick fire exchange in which I explained my requirements :-

Hi J,

I’m looking for something that looks “Factory” as you put it. Something that to the untrained eye would be quite easily missed. Cost I know is going to be up there but the rewards are too. Starting with a brand new tank or as good as new, and shipping a complete, drop on hook up the fuel lines and away I go painted tank.

Design wise I will leave it to you but would love to be kept informed via photo’s and the like as you know I’m a bit of a Mad Blogger LOL so would like to document the whole journey.

Is this enough information to be going on with from my side? Will you need an initial set up payment or how do you work.?

Cheers

Ray 
Jaxon of  www.rideonadv.com took on the project whole heatedly so it was off to find a tank for him create mock ups on before cutting it up. Plus with so much experience on tap at  WildCard Customs
817-831-9700 www.wccprodiselperformance.com this is going to be one very special Project Tank. There are going to be lots of eye's following this one J!


I jumped onto eBay first in the UK only to find there was nothing what so ever new or second hand. Checking the price of a new tank made my eyes water £791.89 including Vat. However a quick look on U.S. eBay brought a massive smile to my face when I spotted this listing:-

YAMAHA SUPER TENERE GAS TANK OEM

NEW NEVER USED


You are looking at a new fuel tank off of a 2012 Yamaha Super Tenere . This tank was ordered for a customer and was never installed and has never had gas in it. This tank is perfect in every way. This would be a great tank to replace a worn or damaged tank. This tank retails for $590.00! Save Money now! This may fit other models as well, so consult with your local dealer before bidding. Check our feedback and bid with confidence. Please let me know if you have any questions. Thank you for looking. 

It was listed at $425 I made an offer of $350 which tejasmotorsports accepted almost immediately.

The original tank can be expanded in three ways, up, out and back. Using a 1 litre oil container bag I’ve taken a few pictures to give J an idea of what I’m looking to achieve this expansion. Initially I was looking to go for a 10 litre expansion but will be happy with anything over 5 litres as this will increase the range of the XT1200Z to 300+ miles.


There is quite a lot of space above the leg
with my feet on the pegs


This is a 1 Litre Oil Container bag
Used to give an idea of space and size


Laid on top give a maximum height level


This shows there is room for almost
3 x 1 litre bags

This is with the side bag sat on my knee.
I think 5 litres is just about do-able
Fingers crossed!


Now it’s a case of getting the tank shipped from the dealer in Texas to J and letting the Maestro do his thing.

Further updates will follow as the Project takes off. Watch this space......