Thursday, 12 September 2013

In search of my ‘Mojo’!

Last night I attended a talk by Mr Ian Coates from Hebden Bridge. Ian was guest speaker of the Pennine Branch of the Vintage Motor Cycle Club (VMCC) at the Kingsway Arms in Rochdale, not 5 minutes from where I live. I arrived at the meeting by sheer fate after being  invited by a chap who has recently powder coated the bash plate on Tango’d but I’ll come to that later.


Ian’s presentation followed a very professional intro by the clubs chairman, including ‘minuting’ my attendance as a guest, followed by the reading of last months minutes, approved and seconded by the members. I was pleasantly surprised at how well run the VMCC meeting was. I’m more accustomed to far less formalities, quick hello, grab a pint and start chatting over a bite to eat with the Manc Riders.


Ian has spent the last 14 year riding around the world on his trusty Honda 750 Africa Twin. He  arrived in Hull back in February and rode straight over to the Manchester Bike Show where he was interviewed for TV and by the local press. His tales of adventure stretched far  and wide encompassing the entire globe. He kept us spellbound for well over an hour and could have gone on for days if it had not have been for the audiences bladders filling up to bursting point. Oh and a small matter of their beer glasses being empty, so the talk was over all too soon in my opinion.

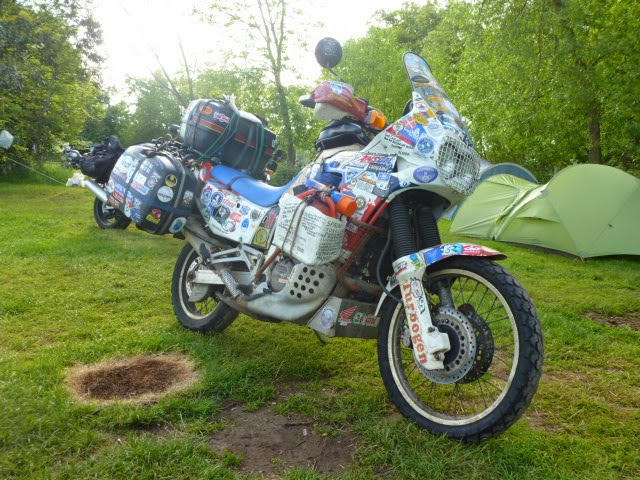
Ian Coates Africa Twin at the 

Fourteen years on the road is an incredible length of time to be away from your wife and family. I’m always full of admiration for people who get way for long periods of time in search of their dreams. I know for a fact I struggle being away from Jeannie, Lilie Rose and Ben for more than a few days, a week and I’m ready to head home. It was an very interesting evening spent in the company of some very knowledgeable vintage bike owners. I’d just like to thank Chris for inviting me along I had a great evening, thank you all for your hospitality.


Earlier that day I fitted two sets of Oxford Mercury LED indicators to Tango’d yes, more about that later too.  Followed by a very enjoyable few hours reading about Kevin & Lyn Weller’s 10 week motorcycle trip over in America and Canada on their BWM 1200GSA which they shipped out especially for the trip and to participate in the Iron Butt Rally . If your stuck for something to do and have a couple of  hours to spare I could think of no better place to lose yourself than within the pages of  Kevin and Lyn’s Blog

They are an amazing couple who have toured so many countries together, photographed extensively by Lyn who rides pillion to Kevin. Their write ups are very entertaining and in my opinion, you would be foolish not to take a look. Well done to you both on your latest adventure, 23,000 miles in 10 weeks is some going. 

So after such an adventure filled day why an I in such an awfully depressed mood today? It’s simple Jeannie says, “You’ve lost your ‘Mojo!’

Day dreaming about traveling on two wheels seem to be the only thing I do of late. After 2008 which can only be described as a ‘mad frenzy of long distance riding’  I seem to have ground to a halt. We’ve just sat and had a real ‘heart to heart’ and the top and bottom of it all is, I need to get out on Mr T. So guess what? I have a plan.

For now I can console myself in being surrounded by books’, blog’s and a bikes, one of which is called Mr T, who is more than capable of whisking me off to adventures anew. 


Sadly at the minute Mr T is sulking at me! He has a flat battery! Which is hardly surprising when you think the last time I rode him was on the 29th of July! How mad is that? Seven whole weeks without even starting him up. No wonder the battery is flat.

The blame for his lack of use is Tango’d my latest project but when a bike has that all round ‘Grin Factor Machine’ who can blame me. I even attended the meeting last night on Tango’d.

There are still a couple of bits on Tango’d that are getting on my nerves one of which is the bash plate. So I took it off and stuck it up for sale. It would have sold to had it not been for all the messing about required to remove the two mounting brackets. I really couldn’t be bothered with taking the headers off and so the sale fell through and I stuck it at the back of the garage for a couple of weeks. 

Trawling eBay for an orange belly pan proved fruitless but just by chance I had a mad idea. “Why not powder coat it?” After another quick Google search I spotted Pennie Powder Coating based in Todmorden about half an hour away. Hanging there in one of the photo’s  were two wheels one powder coated red the other ‘Bright Orange’ Bingo! A quick call to Chris Spacey and we were set. I nipped the bash plate over that afternoon. 


Chris called me three days later to say it was ready for collection. As soon as I’d got off the mobile I became a little nervous because I’d taken the bash plate over in the VW and only compared the colour with a photo of the petrol tank on my iPhone. Arriving on Tango’d, Chris unwrapped the bash plate and held it up against the tank. It was a perfect match! The outcome is plain to see, its looks far better than I ever imagined it would. 

Now that looks better!

Next on my hit list was the rear end. I had intended fitting a ‘tail tidy’ but after many hours of searching and asking around on the XT660.com forum it turns out that the only custom made tail tidy for the 2007+ model would cost 179 Euro’s plus shipping from Off>>>The Road in Germany. On top of which I would then need micro indicators and a number plate mount, making the entire project ludicrously expensive. 

Just out of curiosity I stripped the rear end  off to have a better look. Unless I was willing to cut the light off of the rear tray, which I’m not, it’s a non starter. 

2007 XT660X Rear end
It's one big piece of plastic!

Whilst the  back end was still on the bench I got back on eBay and found a nice set of chrome finished LED indicators. Kev had listed two pairs but there was still 6 days to run! That was far too long for me to wait so after an exchange of messages we cut a deal, two sets for the price of one. Deal done! True to his word two brand new sets of Oxford Mercury LED indicators arrived 2 days later. 

Out with the old
In with the new

Now I thought fitting them would be a breeze, be warned, it’s not! Each individual indicator is fitted with a small 70mm long resistor which takes a little plumbing in.

I just knew this was going to be fun!

Removing the head light altogether made life a lot easier up front. Here’s a photographic run through of the process for those of you planning on fitting a set of sexy indicators.

1) Remove head light & old indicators, bolt on new indicators
2) Use the cable casing from old over the new wires see right
3) Cable tie covered wires to light frame

4) I cut both connectors off of the Oxford indictor wires so I could thread the new wires through the old indicator wire cover
5) Fit new bullet connectors or solder
6) Connect inline resistor

7) Cable tie right wire to light frame
8) Waterproof the resistor and connectors I used 

9) Repeat on left 
10) Cable tie resistor to light frame


11) Re-fit headlight

12) Repeat at the rear
Job Done!

Currently the radiator cover is up in Preston with Les of Bare Grills. I’m having a chrome radiator cover fabricated just to finish off the front end with a bit of ‘bling!’


Having charged Mr T’s battery over night I took a steady ride around the block which brought home what a massive piece of machinery the Super Tenere XT1200Z really is especially with a 32 litre tank full of fuel. 


So what’s the plan to get my ‘Mojo’ back? You guessed it another adventure around Europe. I’m off to participate in the IBA Germany Road Runner Rally in 2 weeks time with Ron. As you can imagine I’m really looking forward to getting back out there and what better way to start than a 24 hour photographic rally Iron Butt style.


What makes this ride a little special is the fact we plan to follow up the rally with a weeks tour of South East Europe. The rough plan is to head East to Prague in the Czech Republic then continue South East through Slovakia into Hungary then Romania and Bulgaria. Before returning via Greece if time allows cutting back North West through Macedonia, Montenegro, Albania and Kosovo. The last leg will see us clipping the corner of Serbia whilst heading into Bosnia and Herzegovina calling in at Split in Croatia. Finally making an IBA ride back to the Channel Tunnel through Croatia, Slovenia, Austria, Germany, Luxembourg, Belgium and France hopefully in time to attend the 2013 RTTW on the 5th of October. That’s if all goes to plan. Failing that we will just mooch around and see where the road takes us.

So something tells me my ‘Mojo’ will be coming back with a vengeance with the adventure that lies  ahead. Hopefully my next Blog will be crammed with exiting tales of the IBA Germany Road Runners Rally and Ron and Rays East European Tour. 

Look out Europe here we come, in search of my ‘Mojo’.


‘Ride well and stay safe’. 

Saturday, 17 August 2013

‘Tango'd’ 9000 Mile Service ......... Done!

I cannot believe I’ve owned ‘Tango'd’ for 6 weeks. Where has the time gone? I’ve even managed to add 550 miles in that time which is not bad considering I was in Spain for a week and a half of that time.

So with just 9348 miles on the clock why did I decide to get a professional service done at Keith Dixon Motorcycles. Well after flushing so much muck out of the brake lines it got me thinking, ‘what if the engine oil is in the same state?’

A quick look in the service book confirmed my worst fears, the last service was done at 7856  miles just 1500 miles back but exactly 2 years ago on 10th August 2011.

Riding over to Keith’s Tango'd felt smooth, responsive and the sound from the new Akrapovic SP Exhaust System is superb. The brakes are steady but still not as sharp and solid as I would like them. This is something I will have to address at a later date. Don’t get me wrong they work and work well but I’d like more of an instant bite same as Mr T’s.

As the service was just a check over I opted to have a brew and wait, immersing myself in ‘Yamaha  Bike Heaven’ at the same time.  After what felt like a very quick hours browsing (but not spending) Tango'd was ready. I nipped back upstairs to settle the bill. 

The service bill reads

Oil Filter........................................   £7.49

Washer...........................................  £1.15

Spark Plug.....................................   £7.48

Semi Synthetic Oil.........................  £20.33

Labour - 1 Hour.............................  £55.00

Grand Total....................................  £91.45


I was delighted reading the bill, £91 was just brilliant news, I just love this XT660X. The mechanic had to clear two error codes from the ECU, annoyingly I forgot to ask what they were. He also set up the CO Emissions followed by a thorough check over. Tangoed was then given a clear bill of health much to my relief, well you never know whats going on inside the engine when you buy a bike second hand.

Riding home the motor ran silky smooth and with a noticeable change in tone to a really low hum, accentuated by the exhausts. Tangoed was even more responsive on the throttle than on the ride in. 

The piece of mind that comes with having a professionals input is priceless making the £91 a worth while investment as far as I am concerned. 

Later on in the day I had a ride out over the tops towards Halifax. Doubling back I just happened to pass Adventure Spec in Mytholmroyd so did a quick U -turn and popped in to see if they had any Pivot Pegz for the XT660X. As luck would have it they did and so with what I saved on the service compared to Mr T’s service costs I treat Tangoed to a set as I love them on Mr T.


I do like my Pivot Pegz

Fitting took all of 15 minutes and I have to say they look superb.

The only other things I plan doing to finish the project off is to find and fit a good quality tail tidy and finally fit a set of LED indicators all round.

The tail tidy is turning into some what of a challenge as the chap on the XT660.Com Forum no longer makes the tail tidy and the only other ones listed is an R&G Tail Tidy made for the XT660 Tenere.

On the other hand, the choice of LED Indicators is overwhelming. My first choice was the Oxford Nano Indicators but at £55 a pair I’m having second thoughts. Especially as I can buy original Yamaha LED Indicators the same as on Mr T for £47 from Keith’s.

And that folk’s as they say is that, for now anyway! Till the next time “Ride well and stay safe”.


Monday, 5 August 2013

Carbon Fibre Vinyl Wrapping Raymondo Style

Well having bought a roll of Carbon Fibre Vinyl Wrap (CF Wrap) on eBay absolutely months ago I thought it about time that I actually use it to cover something other than my office desk.

No honestly!

Now, not being a professional in the use of this stuff I first did a little home-work on YouTube. This has got to be the funniest by Custom Spray Mods! 

A Cracking Video

As I could not get Ben away from his games console a video was out of the question! So it’s a photographic walk through of how I covered the side panels on ‘Tango'd’


First of all I needed to remove the wrap that was applied by a previous owner. The old CF Wrap was of a different pattern and not finished off as well as I wanted it to be. 

Just not in keeping, so it had to go

Then I gave the panel a wash to remove all traces of grease and dirt.

Clean and ready to cover

I like to cut the CF Wrap with sharp scissors rather than using a Stanley Knife or loose blade simply because I find it easier.


The first cut is a rough over sized shape, followed by a closer shaped cut.

First cut

If I have any straight edges that will remain on show I make sure that they are the first edge to be cut.

Second cut with straight edge

If it’s a small panel lay the CF Wrap flat on a clean bench and place the panel on top.

Here the straight edge is clearly visible 

I try to stick as much of the CF Wrap on without the use of the hair dryer as it is easier to handle whilst still in its ‘stiff’ condition. Once you apply heat, the CF Wrap becomes extremely malleable and can become difficult to handle.

Getting a good start point is important

I use a clean white cloth to smooth the CF Wrap on, or a damp piece of kitchen towel.

Difficult edges are overcome with a series of small nick’s, cut’s and folds to ensure a tidy finish.

To avoid this!

Take your time


Cut up to the edge

Fold carefully applying heat when needed

To achieve a neat finish
Slowly does it every time


As for creases and kinks in the panel that is where the application of heat from the hair dryer comes into its own.

Try to fold the CF Wrap into the creases
Without stretching over them

Remove all excess CF Wrap 
Before folding over 

One of the biggest problems I find is folding the CF Wrap over the edge of panels that have curves and ridges. My biggest mistake was applying the heat and then stretching the CF Wrap too much. This inevitably caused the CF Wrap to come away from the ridge and form an air pocket once the CF Wrap cooled down.

Almost complete

How I over came this was to release the CF Wrap and slide it into the crease without pulling it over the edge of the panel. Then after smoothing the CF Wrap into the crease I spend an extra 10 minutes reheating the over hanging CF Wrap and re-applying it over the very edge of the panel.

The finished item

At this stage the panel starts to look like the finished item. If the excess CF Wrap is out of sight i.e. bolted underneath the forks then less time and energy is wasted as its pointless no one will ever see it anyway.


Job a good'en
Even if it is the other side!

Here’s a series of before and after shots to show what can be achieved with Carbon Fibre Vinyl Wrap - and a little patience. 

From this to .....

This!

And this ......

To this with a little TLC


Job Done!


Wednesday, 31 July 2013

A Yamaha XT660X called “Tango'd”

Standing in the 660 sellers garage looking at his bright orange Yamaha XT660X I had mixed feelings.

Yes it was a good price, confirmed the following morning by a quick call to Keith, and yes, it was exactly what I was looking for. 

“I’ll check out insurance quotes and give you a call in the morning” were my parting word’s. Not exactly what the seller wanted to hear but I needed an evening's 'cooling off period'.

A quick call to my insurer confirmed adding the 660 to Mr T’s insurance would cost £83, Bonus! Annoyingly £35 of that was their ‘Admin Fee'. 

True to my word, half an hour later I called the seller.

“Hi there, Ray here. Can you give me your bank details and I’ll transfer the money over. Will you give me a call when the money arrives? I’ll organise collection when you have the funds."

“That’s brilliant new’s” replied the seller.

A couple of days later Jeannie dropped me off at the sellers house and drove away just as he rode the 660 around the corner.

'Tango'd' arrives home

So why an XT660X? And more importantly why “bright orange’

Well after having an absolute ball on Nick Sanders XT660R on the Expedition Centre Experience  I had started looking into this fun bike more seriously.  Doing quite a bit of research into the bike on the XT660.com forum. 

A Fathers Day Prize
Never to be forgotten!

As for the colour, well that’s really simple to answer, this bright orange Yamaha XT660X just made me smile. In fact it still does every single time I see it, let alone ride it. It’s got that all important “Grin Factor” I like to have when buying something. No grin no buy, what's the point. 

As soon as I got the 660 home I got stuck in. Here’s a list of the things that needed immediate attention.

  1. The front brake was almost useless even though it had new brake pads fitted recently!
  2. The left hand grip just spun around on the bar.
  3. Handel bar cover needed removing as it was disintegrating under which I was surprised to find a nice set of Renthal bars which was a bonus!
  4. Original hand guards were scratched to oblivion. (Apparently caused by catching the house and fence on the way in and out of the shed by another previous owner, or so I was told)
  5. Front nearside tank trim or “wind deflector” as Yamaha call it was broken inside. The fasting bracket was snapped clean off causing it to flap about when ridden.
  6. Front mud guard was scratched near the tip.
  7. Chain was totally ‘goosed’ rusty and stiff in parts.
  8. Fuelling was all over the place, it was like riding a Kangaroo all the way back.
  9. Rear brake was spongy and pads were well worn.
  10. Front tyre was ‘fried’ at the edges. Apparently it was an ex race tyre recently fitted in order to pass the MOT in February.
  11. Finally the seat had a fine coating of black mildew all along the orange section because of the damp storage conditions.

I knew the bike had be dropped on the nearside at some point  due to the damage. This was confirmed when I removed two brand new stickers. The sticker on the nose cone was covering up a few scratches to the near side and the sticker on the nearside tank panel also covered a nasty set of scratches. I found out later that the tank sticker alone had cost over £50 when a new panel was only £38!

Very new and very purple

To be honest, non of this bothered me because I'd have it all fixed within a couple of  days anyway. What was more important to me was the fact that the 660 had only done 8800 miles since new and the milage was backed up by the service book and MOT certificates.

The 660 had covered 4338 miles from new in 2007 up to 2010, followed by 3516 up until 2011. I have no record of an MOT in 2012 but 900 miles were added up until the MOT in February this year, 2013. 

The Service Book confirms that I am the fifth owner. The 6 Week service took place at 592 miles in London, followed by the first service carried out at 4764 miles in 2010 in Melton Mowbray. The final service stamp in the book was carried out at 7856 miles in August 2011 here in Manchester by Philip Youles. 

That night I jumped on eBay and got started by buying:-
  1. One near side panel or “wind deflector” £38
  2. A pair of new mirrors from Hong Kong £36
  3. K&N Air Filter £33
  4. Carbon Pin Stripe £3
  5. Nitro X Fuel Commander £34
Followed a week later after having the back wheel out by 

     5. EBC Brake Pads £16
     6. Set of four Cush Drives £38

Then after pricing  up an Akrapovic SP Series Exhaust System at Keith Dixon’s which came in at a staggering £795 I bid on and won

     7. Akrapovic SP Series Exhaust System £500 (Bargain!)

The following morning I took a ride over to the Rocket Centre in Blackburn as I knew they have a very good “Off-Road Bike department” and bought 
  1. Acerbis Rally Pro Black Hand Guards £75
  2. ProTaper Grip Glue £8
  3. Oxford Tax disc Holder £ £15
  4. Oxford Brake Bleeding Kit £12

Then it was round to Keith Dixon’s in Accrington to pick up 
  1. Oxford Heated Grips £80
  2. Yamaha Emblem £6 (which I hope to return soon as it's the wrong sizes)

Finally I called into AllBikes of Rochdale  on my way home for
  1. R&G Fork Protectors & Swing Warm Protectors £60

Once home I called B&C Performance Tyre's to order a pair of Continental Road Attack 2’s and an X-Ring Chain and sprocket set which came to £330, ride in fitted ride out.


So with my head in full on “fix-it” mode I wheeled the XT660X into the ‘Walton Chop-Shop’ as my Manc Rider mates lovingly call my garage and got stuck in.

It took me an hour to strip off, front mudguard, hand guards, hand grips, seat, tank panels, bash plate, Air filter and rusty wing mirrors.

I made a start by fitting the heated grip’s, followed by the mirrors, Hand guards, followed by the freshly Carbon covered front mud guard. I also fitted the R&G Crash Bobbin's and Optimate hook-up whilst I was at it.

Not good....

Now that's better

Looking rather sexy if I say so myself

Before

And After

Next up was a little TLC to the tank before re-fitting the ‘wind deflector’s then it was time to replace the old tax disc with the new one.


I'm rather pleased with the finish
What do you think?

I bled both the front and rear brakes, the lumpy tea coloured fluid that came out was full of bubbles and bits. The front break was instantly better as it had the new brake pads fitted but the rear only improved with the addition of new pads and another flush through. 

Yuck!

Clean n fresh

All in all I spent about 6 hours in the garage that day, cleaning and sorting svarous job’s along the way.

I cut the air intake rubber down as I'd seen on the XT660 Forum and fitted the K&N Air Filter. Fitting the Nitro-X Fuel Commender took all of 15 minutes especially when I attached to small metal connectors that i had spare. This was followed by 100 fun filled miles dialling the commender into the original exhausts. It made an instant impact running at 70% power output (according to the paperwork that came with it).

I didn't remove the scoop totally
Just to retain a little protection from dirt

Little box of tricks running at 90%

Nice and tidy just the way I like it

I got the call to say my tyre’s, chain and sprocket set were in whilst I was down in Spain so they had to wait until I returned the following week.

Driving back from Spain I received an email from eBay to say I had won the Akrapovic SP Series Exhaust System much to my delight. Lucky for me I had preempted this and contacted the seller in Scotland to explain I’d be away when the auction finished. Good to his word he posted the system as arranged and we both arrived home on the same day.

Fitting the Akrapovic SP Series Exhaust System took 30 minutes from start to finish and that included unpack g the new system. The impact on the bikes power and in smoothing out the remaining 'Kangaroo' effect was massive. I initially took out the baffles but the noise was too intrusive and replaced them straight away. I'm now running the fuel commander at 90% power but finding it a little rich when the engine is cold.

From this....

To this....  A 'No-Brainer'

Needless to say after the guy’s at B&C Performance Tyre's did a great job fitting the tyre’s, chain and sprocket set. They even dropped the new Cush drives and rear brake pads in whilst the rear wheel was out. 

Now that's what I call 'Tidy'

Even the front end got
'The Carbon Touch!'

I’m now riding a silky smooth, power house of a machine that makes me laugh out loud every time I get onboard. 

All that's left to do now is to take the mileage up to 12,000 miles and get 'Tangoed' professionally serviced and the book stamped once again.

Now you may just be wondering how ‘Tango'd’ came by it’s name. Well those of you who know me know that I name all my bike’s. It just saves on garage confusion.


I’d planned on calling it Mr X due to it being an XT660X! The Manc Riders, in particular Lefty, had other idea’s calling it ‘Tango'd’ from the start and so “Tango'd” it is!

Brothers in Arm's