Tuesday 28 January 2014

Fitting Sato Racing Street Hooks to a CBR1000RR

To be honest I had never heard of Sato Racing Street Hooks let alone thought about fitting a set. 


I was busy trawling the 1000RR Forum, as I often do since buying the Blade, and came across a photo of a bike with Sato Racing Hooks which I immediately liked due to there neat and tidy appearance. Reading on a little further I discovered Sato Racing made two specific styles of Hook’s. The Race Hooks are, as the name implies, designed as a secure anchor point for race bikes to be attached to trailers.

The Street Hooks do the same job but with the added benefit of allowing you to re-attach the pillion foot pegs in a mater of minutes. This is perfect for my requirements as Ben and Jeannie both enjoy a ride out every now and again.

What I want is a tidy rear end on the Blade! With the stock pillion foot pegs being silver I just had to do something to sort them out and so I ordered a set of  Black Sato Racing Street Hooks from IntoBikes then waited 10 days for them to arrive. As ever the time flew and before I knew it they were sat on my office desk waiting to be fitted.

With nothing in the diary for today I set about the task of fitting the Street Hooks having read a number of posts assuring me it was a steady 2 hours job.

Here’s my guide to fitting the Sato Racing Street Hooks.

1) First of all you ned to “Tool Up!”

a) 5mm Allen Key (Long & Short)
b) 6mm Allen Key 
c) 8mm Spanner
d) 12mm Spanner
e) 14mm Spanner
f) 14mm Socket & Wrench (Socket wrapped in masking tape to prevent scratching)
f) Philips Screwdriver
g) Fine Blade Electrical Screwdriver


2) Set the bike up so it’s easy to work on and  place a towel over the rear hugger or rear wheel if you do not have a hugger fitted.


3) Remove rear seat using ignition key. Unclip the 2 covers found under the front seat taking care not to brake the mounting lugs, unscrew the 2 phillips crews and remove the front seat. Lay out parts in order as you go.


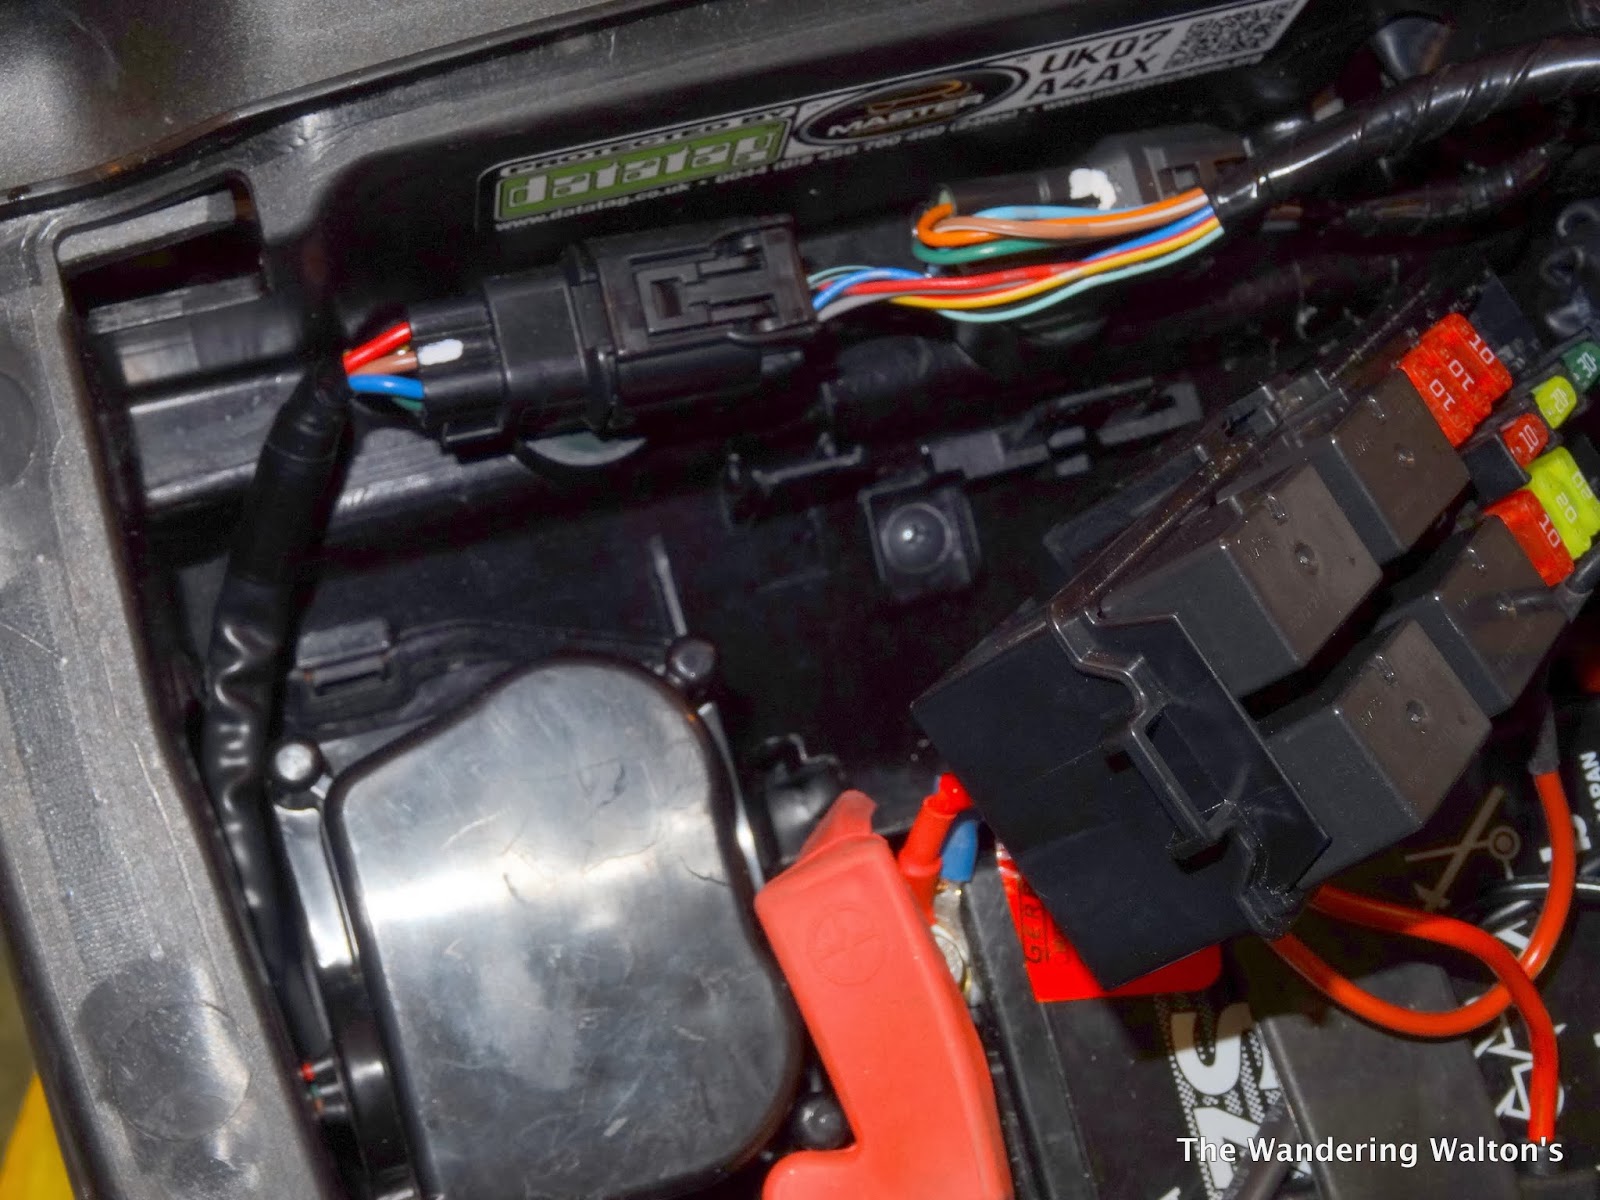
4) Take the fine electrical screwdriver and slide it down the back of the fuse block between the very slim mounting clip and lift the box up and forward. This will reveal a phillips screw that holds the rear light section in place at the front. Remove the screw and whilst your there disconnect the right hand electrical connector. Also unclip the small white electrical connector tucked down the right hand side (when your stood on the right of the bike looking back) of the battery.


5) In my case I removed the Venture Luggage Rack. If you do not have a rack fitted you will find 4 black 5mm allen screws tucked inside the pillion grab holes under the rear fairing. Use a torch if you are struggling to see them and remove 2 of the 4 allen screws with the long 5mm allen key. Loosen the remaining 2 allen screws but  leave attached to carry the weight of the rear light section.


6) Working from above remove the 4 black 5mm allen screws and the 2 push though plastic pins from the rear fairing. Also remove the 2 chrome 5mm allen screws just behind the tank cover and the 2 on the side just in front of the seat fastening screws. Lay all parts in order to one side.


7) Now stand at the back of the bike and holding the rear fairing assembly as far forward as possible ease the left side out and lift, then do the same to the right. You need to unhook the two plastic lips from within their slots. Once you have done this just slide the whole section backwards and put with the rest of the kit.


8) Next remove the two loose allen screws from underneath the rear grab holes and slide the whole light assembly back and away from the bike. Carefully passing the two electrical connectors through the hole in the frame.


9) I then removed the rear seat lock assembly using the 8mm spanner followed by the aluminium cross member underneath using the same 8mm spanner.


It’s now time for a brew!

10) In readiness for splitting the sub frame I layer a cloth on the floor so as to protect the paintwork. Using a 12mmm spanner remove the bolt at the very rear of the sub frame.


11) Now with the 14mm socket and wrench remove the two bolts holding the right hand side sub frame to the main frame. The right hand side sub frame will now lift away once unhooked from the battery case which just hooks over the top edge a little.


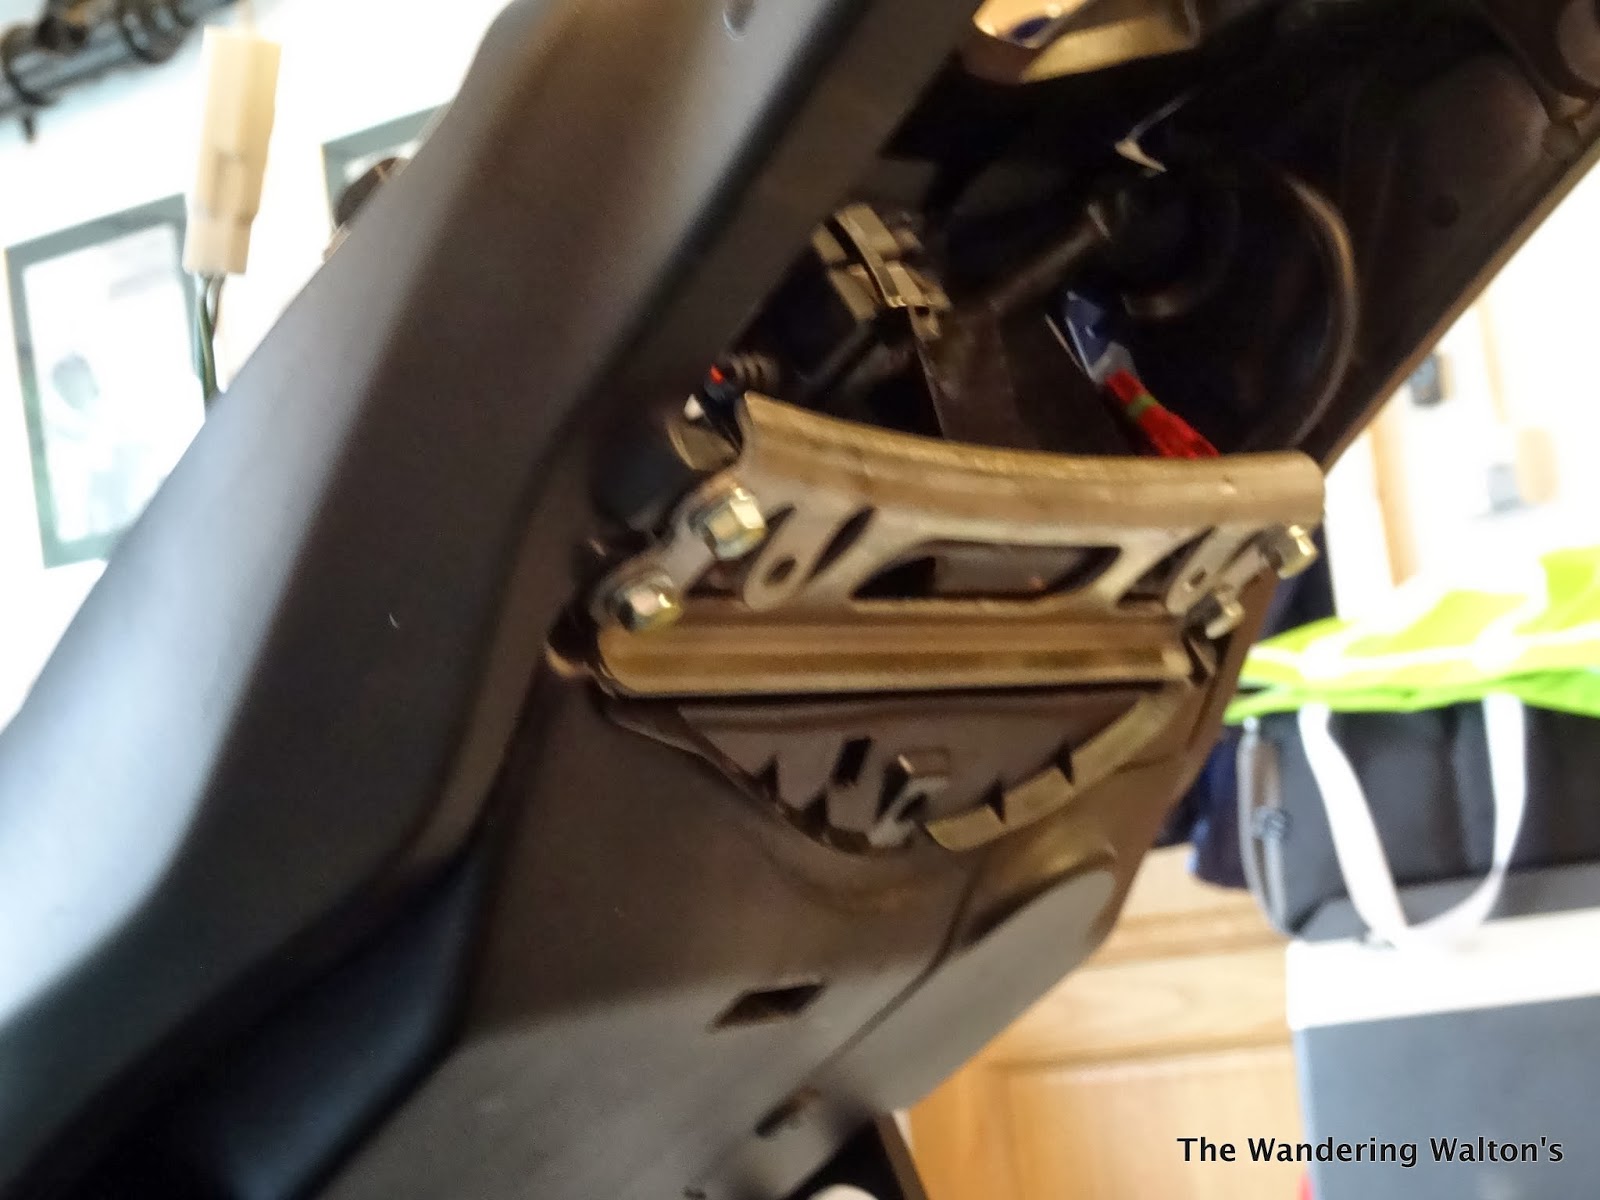
12) Place the right hand side sub frame face down and remove the rear foot peg using a 6mm allen key. There is a fair amount of thread lock on the bolts. The bolts will make a loud ‘crack’ sound as the thread lock gives way. If you are struggling, use a 6mm allen wrench for extra leverage.


13) Attach the Sato Street Hooks using the original 6mm allen bolts.


14) Re-attach the right hand sub frame to the main frame using the 14mm socket and wrench. You will need the 14mm spanner to hold nut on the lower longer bolt in order to tighten it up.


15) Repeat the process on the left hand side.

Taking your rear end from this

To this

To this in a matter of minutes
Result!

16) With both sub frames re-attached start to re-assemble the rear section. Refit the locking mechanism, re-insert the 2 plastic clips. I took this opportunity to fit slightly larger and stronger clips.


17) Re-fit the lower cross member and the 12mm bolt at the very rear. Slide the rear light assembly back into place and fasten loosely with the 4 black 5mm allen screws then attach the philips screw under the fuse box. I threaded the wiring back through the hole and clipped the two electrical connectors back together and refitted the fuse box at the same time. With that done I tightened the rear light assembly bolts in the pillion grab holes. Test your indicators and brake light before going any further.


18) Next refit the rear fairing section ensuring the two plastic lips slot back into their relevant slots. Now screw the 4 black 5mm allen screw back in, do not be tempted to push them through the rubber as its far easier to just crew them in.


19) All that is left to do now is refit the rear seat (or cowling) and refit front seat and side panels.

20) Now stand back and admire your Sato Racing Street Hooks!


As a foot note. I am no mechanic and the whole process took two hours, that included me Tweeting the whole process and taking loads of Photo’s. If you do decide to undertake this task, this blog is meant purely as a guide and I will not be held responsible in any way, shape or form for your work. 

Monday 27 January 2014

New Beginnings


Now it really is 'My Blade'

Well to say my plan for 2014 was not to plan, the diary is filling up at an alarming rate. 

January has already seen me attending the 1000RR Forum breakfast meeting in St Helens, taking a ride to Temple Normanton  near Chesterfield to visit my Mum's grave on her birthday followed the next day by Bens first pillion ride to Cannock to attend the now famous IBA UK RTE hosted by John & Sonia. I started writing the blog on the flight to Alicante heading to San Miguel de Salinas where I'd business to attend to. This was followed by a session sat in Alicante departure lounge, adding a little more information to what is turning out to be an amazing months blog. I am also really looking forward to the Manc Riders 4th Annual RTE at the Moorcock Inn Littleborough on Sunday next week which will bring January to a close.

So rewinding back to the beginning of January the first thing I have to mention is, I stopped drinking alcohol! Non what so ever for the entire month of January, exactly the same as last year but this year I’ve also chosen to lose 10lb by the end of the month. Taking me down from 12 stone 10 pound on new years day to 12 stone. Wish me luck!

1st January 2014

First up on my ‘To-Do List’ was to get the Blade ready to take on whatever our British roads and weather had to throw at it. “Love your bike, protect your bike!” its that simple. The first couple of rides told me straight away I needed to get the bodywork and exposed metal work sorted as soon as possible.

So without further a do  I asked Dave round to deep clean the bike and then thoroughly coat it with ACF50. Having the ACF50 professionally applied ensures every part of the bike is covered with a very fine coating as opposed to me just liberally dousing the parts I can see with an aerosol and missing the hard to reach parts. As ever a couple of the Manc Riders took advantage of Dave's services, not to mention a half decent brew and a bacon butty. 

Next on my list was protecting the paint work. As beautiful as the Blade is, the nose is just screaming out to take a battering from flying debris. So in my opinion there is only one solution to slowing this onslaught down and that is Venture Shield. Not cheap I admit but worth every penny. Having ordered the full CBR1000RR 2012/2013 kit from BodyGuard UK I sat back and waited for it to arrive. 

Meanwhile I order pretty much every  CBR1000RR 2012 R&G Crash Protection product I could find. Front Spindle bobbins, radiator guard, header guard, fairing sliders, rear offset bobbins and to finish off the ensemble the very sexy tail tidy.  Brian at Rochdale Honda (known to some as All-Bike of Rochdale) did a great job getting all the parts during the Christmas and New Year breaks ready for fitting at the first service.

'Father Christmas Honda Style'
Great job Brian

One thing I have missed about both the Tenere XT1200Z and the FJR1300 is the handle bar bag. Not having anywhere to put my camera, wallet, keys and the like is just a pain. So having seen the shaped SW-Motech petrol cap mounted tank bag in the display cabinet I promptly added it to my first service fitting list. 

To ensure I didn't end up getting buffeted too much I started researching a 'Double Bubble' screen firstly on the 1000RR Forum followed by a quick look around the web.  After a great deal of questions to and fro from myself to other members I eventually decided on the dark tint Zero Gravity Screen purely as a matter of personal preference available at SportsBikeShop

Heading in the right direction

On the 5th January I rode over to Millennium Motorcycles in St Helens to meet up with the 1000RR Forum guys for a brew and breakfast.  It was cold but no snow and only a hint of rain in the air. There was a great turn out with around 20 people in attendance. It was nice to be made to feel welcome by everyone. The morning was spent chatting about bikes, European trips, track days and loads of casual banter amongst the form members who all knew each other very well. 

The 1000RR Forum Breakfast Crew
(Thanks for the use of the photo Si)

After a  brew and a natter I headed off up towards Southport from St. Helens unfortunately I missed the group photo. Having a quick change of heart I cut back across towards Blackburn and then back down to Rivington Hall Barn to see if there was anything happening as this very popular North West biker meeting place. Finding a luxury tour coach parked in the bike park enclosure answered that question. A quick loo stop and I was off home. The mileage after 3 rides sat at 550 which was close enough to the 600 first service milage for me.

Bright and early Monday morning I was outside Rochdale Honda at 08:45 hours. Brian had done me proud in obtaining everything on my wish list even down to the black mounting ring for the tank bag. Kevin in sales kindly sorted me a courtesy bike in the form of a CB500 just to get home on. I could not believe it when my mobile rang at 1400 hours to say my bike was ready. There is no way I could have fitted all that kit in such a short period of time. To top it all off Brian and Kevin got together and sorted me a cracking deal and didn't charge me for fitting any of the kit. Guys you are absolutely blinding, thank you. Not forgetting Arthur who's perfect fitting of the fairing sliders, along with everything else, just has to get a special mention.  

Blade looks brilliant

The Venture Shield kit arrived a few days later in a nice long clear plastic tube. What followed can only be described as 'pure carnage' of the garage variety. Following the instructions to the letter I managed to fit 18 pieces out of the 21 piece kit with just a spot of drama along the way. The problem is, I'm a perfectionist and fitting Venture Shield to a black Blade I now know is defiantly best left to the professionals. 

This was the easy part!

After cutting the backing paper that the pre cut coating parts are stuck to into its numerous individual part, I started with the front mudguard section as it looked the smallest and possibly the easiest to fit. Wrong!

Not happy

Not happy at all

With that piece duly attached, removed and un ceremoniously screwed up and thrown at the bench the second piece didn't do me any favours either. A large smudge mark appeared once it was fitted. I was gutted but took a break, rang the guys at BodyGuard UK who assured me I was doing everything right and boosted my confidence sufficiently to carry on. They even offered to replace the parts I'd messed up at no extra cost to myself, which I readily accepted. Now that's a level of service you don't get every day. After the initial disasters everything else just fell into place with little to no drama. Within 2 hours there was only the nose section to go on. 

Now your talking. Key word, invisible!

Taking my time I fitted the nose section and for a while it looked like I was winning. All was well until it was finished and I nipped to the loo. On my return there was a huge grey patch to the right of the left mirror mount. On closer inspection there were a couple of miniature stones and a tiny hair. The hair dryer came out and off it came. A quick call to BodyGuard UK to ask if there were any local fitters and I was pointed in the direction of Invisible Patterns over near Leigh. That call went on hold for a few days as I had other stuff to sort out first.

Now Ben really enjoys our January RTE's especially the IBA UK January RTE down at John and Sonia's near Cannock mainly because John always  has something up his sleeve to keep us all mesmerised. This year would be no different. With this in mind my thoughts turned to making sure Ben would be safe and on the back of the Blade. 

Got stuck at this for a few days

For the last 5 years all my bikes have had a top box fitted, the Blade is a totally different beast all together. Now I must admit this issue was at the forefront of my mind way before I'd even bought the Blade so I had already done a substantial amount of research before the purchase took place. The choice was simple, it just had to be a Ventura Luggage system.

Now we're ready for anything

The Venture Luggage system was developed in New Zealand and is based on a very simple idea. There are two mounts that fit to already existing mounting points on the bikes frame so you do not have to worry about modifying the bike in any way. 

There are a number of options you have once you have fitted the bike specific mounting bars called L-Brackets, by the company, which simply bolt to your bike. The first is a simple grab rail which slots into the tubular frame and fastens tight with two bolts. Once in place all fixings are tightened up job done. Remove the grab rail by just unscrewing two bolts, (a little foot note is needed here, loosen the frame fixings too, it make removal and install far easier) there is a low level Sport-Rack which incorporates a slightly higher grab rail and rear rack. The final option is a Pack-Rack. This is the one I have chosen as it offers the most protection for my precious pillions Ben and Jeannie. Although I must stress the company clearly state this is not a ‘back-rest’!

Venture Luggage Bags of various size and shapes then slot onto both the Sport-Rack and the Pack- Rack. If you require even more luggage space then you simply zip two large capacity bags together, one rests over the pillion seat and the other sits over the rack. Very simple in design but extremely effective. Especially if you take the weight distribution into account which fully loaded is evenly balanced over the pillion seat and the rear of the bike. The Sports-Rack and Pack-Rack can also be mounted with the rack facing forward so the bag sits over the rear seat but not on it.

But was soon on the move again

I think it is a brilliant bit of kit however the jury is still out amongst members of the 1000RR Forum who seem to be evenly split between Ventura Luggage and the amazingly constructed Krega Luggage systems. I'll leave that debate to continue but needless to say if your a regular pillion carrier there is really only one truly versatile option available to you and that is the brilliant Ventura Luggage System.

I feel so much happier knowing
Ventura Luggage is doing a good job

A ride over to Leigh followed a couple of weeks later as life began to take over, as it does from time to time. Russ at Invisible Patterns made fitting the front nose section, the front mud guard and replacing the front fairing leading edge sections look like child's play. If you are thinking of fitting Venture Shield my advise would be spend that little bit extra and save yourself a whole wold of pain and get it fitted professionally. The results are astounding, especially when you take into account that it's almost invisible once fitted! Many thank’s Russ your work is spot on and I've already recommended you to a number of my mates. 

The Master at work
Cheers Russ

As is so often the case in the Walton household everything happens at once. Venture Shield fitting Thursday was followed by a ride to Temple Normanton on Friday for my 12th year to place flowers on my beloved Mum's grave.  This year however was the very first time there was a funeral service taking place. I was met by the coffin bearers at the gate, who were somewhat surprised at a biker poling up with a huge bunch of flowers sticking out of his top box. Nothing was said as I went about my business and had a nice chat with my Mum. 

We all love and miss you Mum x x x 

Next Day Ben and I rode down to John and Sonia's near Cannock to attend the 4th Annual IBA UK January RTE. The ride down was very sedate along the M60, M62 and South bound along the M6. The return trip was far more fun through the twisties of Derbyshire. Cannock, Stone, Leek, Buxton, Chappel-en-le-Frith and home to Wardle. It was great to meet up with folks we knew and to meet folks we did not know. Many thanks once again to John and Sonia for a memorable RTE. It's not everyday you get to see a 'Pulse-Rocket" fired up now is it!

IBA UK 4th Annual RTE 2014
(Many thanks for the use of the photo Phil)

Yesterday (Sunday 26th January) Jeannie, Lilie Rose, Ben and I attended the Manc Riders RTE at the Moorcock Inn near Littleborough. The weather was atrocious and only Trooper braved the eliminates to attend on his bike. It was a cosy affair with number of member unable to attend due to illness, breakdowns (of the bike verity), work and holidays in far off places. Those that did attend were treat to some wonderful food, banter a plenty and a little raffle to raise more funds for the Haemophiliac Society. All in all a good time was had and next year will be our 5th Anniversary RTE, how time flies.

Manc Riders 4th Annual RTE 2014
(Many thanks for the use of the photo Oggy)

Big Respect goes to Trooper

So what else has appeared in the diary for 2014 even though I'm adamant I'm not 'booking' any rides in. 

Well I've booked myself  on a course at the Ron Haslam School of Racing in May. This will be the very first time I have ridden around a race track in my 34 years of riding other than the 28 laps of the Isle of Mann TT course in 30 hours. To say I'm a little exited about the day would be the understatement of the year. 

January 27th 2014
Result!

Ben & I are currently debating on weather to take part in this years RBLR1000 in June or just use that time to visit Scotland and tour Loch Ness and the Isle of Skye. There will be a little more discussion about that before I publish any firm detail so more about that at a later date.

Other rides such as the IBA UK European RTE’s are just penciled in the diary, just on the off chance but I'm finding that most trips clash with family commitments which is very frustrating. 

That is all I have for you for the time being and so until the next time take care.

Not be long now Ben, not long at all!

“Ride well and stay safe, it’s a jungle out there”